Making in education is a current "hot topic" for schools looking to offer students creative, authentic learning experiences. Schools around the world are taking spaces large and small into the 21st century by combining curriculum, craft and a dose of creativity. The tools of the maker movement are accelerating into schools at a rapid pace. It seems a day doesn't go by without hearing about something new to buy - but where do people put all this stuff?
Many schools are looking at traditional media centers, computer labs, and libraries as spaces that can be repurposed. In many cases, the space will serve dual purposes, where the tried and true must coexist with the new. Where will all the materials and tools go? And if students are not sitting and quietly reading (as if they ever did), how will we manage all the movement, noise, and STUFF!?
Traditionally, a library space is designed around the needs of people as they access books, and more recently, computers. When planning additional functionality for this space, consider how the new functions are similar to traditional library and media center uses, and how they are different. Libraries and makerspaces can coexist naturally - don't draw a line down the middle. You also don't have to change the name or throw away all the books. There is incredible potential to be found in integrating the traditional functions of a library with makerspace activities.
In fact, many aspects of the best makerspaces already exist in libraries:
- Libraries are community spaces that offer learning outside classroom structures and time limitations.
- Libraries model cross-grade, cross-curricular experiences.
- Libraries are about making meaning and making sense of the world, which is the most important aspect of making in an educational context.
Last but not least, libraries have librarians. Librarians are experts in finding resources and connecting them with kids and teachers who need them. Librarians help people make sense of new ideas and things, and that leads to new learning experiences. Librarians are guides to these experiences, not the owners of the experiences. This is exactly what a makerspace needs.
Physical Space
Your makerspace will have more moving parts and people than a typical library. The goal is a space that encourages creativity while taking into account both functionality and flexibility. Sometimes that's a tradeoff. Movable furniture maximizes flexibility, but requires extra space. Plan for more electrical outlets than you think you will need, accessible throughout the room without extension cords. Chalk, whiteboard, or magnetic paint turns walls and tables into brainstorming surfaces. Preserve space to ease traffic flow around busy work centers. This increases both safety and opportunities for collaboration.
Maker-style projects require more than a standard allocation of tablespace. Students will likely not only have tools and materials, but also a laptop or tablet that they will be using as they work. Conversely, if students use desktop computers very close to each other, you will need to space them further apart so there is workspace next to each one.
You may find that a library table for ten readers only works for six makers. If that's the case, rearrange the chairs, creating more space to walk around and collaborate. If a space is simply too small, crowded, or uncomfortable, those using it (both children and adults) will be less likely to enjoy working there. Good lighting, space to spread out, and organized resources will go a long way towards making your space functional.
Storage
The types of projects typically found in a makerspace call for two types of makerspace storage: materials/tools and projects. Students need access to tools and materials as they work. Access may be limited for some tools or materials due to cost or safety, but by and large, students should be able to access a wide range of materials and tools as they work, tinker, change their minds, and recalibrate what they need.
Material and tool storage
Organizing materials is highly personal and a matter of style. Some teachers like to maintain pristine kits assigned to specific students or teams of students. Others prefer to group parts by similar size, shape, color, or function in bins or Ziploc bags for use by all students at any time.
As much as possible, students should be able to see the choices they have as they make them. Selecting the right tool for the job is not just a matter of knowing which wrench to use, but maybe hefting it in your hand, trying it, and coming back for a different one. This won't happen if getting a tool is encumbered by a long checkout process, an empty rack of tools, or a gigantic mess where nothing can be found.
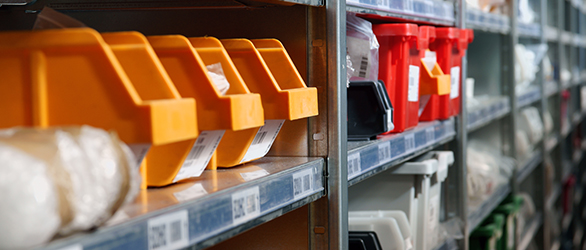
One creative way to organize makerspace materials and tools is to create a ranking system with colors. For young children, a "red, yellow, green light" system can work to designate which tools are "green lights" - meaning free to use at any time. Yellow lights can only be taken one at a time, and red lights need permission. Materials can also be designated with levels - from materials that can be used freely (because they are cheap and safe) to riskier tools or expensive materials that must be checked out, or used only by certain certified students. Colored bins or shelf labels can maintain these systems.
Don't forget that many makerspace projects will include computers and students may have a variety of devices. It may be easier to have a few computers permanently set up to communicate with microcomputers, 3D printers, or other computer-enabled devices, rather than trying to make every student computer work with these tools. Once you set them up and install the correct drivers and software, they will continue to work without additional tech support.
Project Storage
You will need to decide what to do about projects on their way to completion. Do you have enough space for students to have personal storage? Can you create some shelf space where students can move partial projects and put their names on them? Don't forget to use empty wall space. If projects are small, they can be bagged and attached to a clothesline by a clothespin.
Combine project storage and display - perhaps in hallways, trophy cases, or administrative offices. This extends an invitation to participate in the excitement inside the makerspace, and communicates to everyone in school (and the community) that creativity happens here!
An active makerspace will inevitably become a messy makerspace. Cleaning up after yourself and respecting the materials should be an expectation for students at all times. The kindergarten rules of good citizenship apply. However, when constrained by limited time, teachers need to reserve as much time as possible for project work and employ strategies to reduce cleanup time. As long as work may proceed and custodians are not going to vacuum up valuable materials, you might endure some temporary messiness.
Ask for student volunteers to come in during lunch or after school to help collect, sort, and reorganize the materials. You may be surprised by how many kids are willing to help. Another strategy is to have students reorganize the materials they will need for a specific project at the beginning of that project. This also allows them to become familiar with new materials.
Safety and Security
Anytime you have electronics, tools, chemicals, or anything else that can cause injury, you must employ proper safety precautions. Valuable and/or dangerous equipment needs to be secured when not in use, for both safety and security.
Safety concerns are going to vary widely depending on your materials, equipment, and student projects. Follow school policy, local laws, and manufacturer's instructions regarding ventilation, chemicals, protective eyewear, and other protective gear. Do your homework about the tools and materials you are planning to use and make appropriate rules.
Here are a few important points to keep in mind:
- Make sure your first aid kit and fire extinguisher are current and accessible.
- Be cautious, but not overly cautious to the point of never letting children use the tools.
- Think through your projects from start to finish. Giving students paper plates and covering the table with a plastic tablecloth might be a good plan for keeping track of parts in a craft project, but if soldering is on the agenda, you've just created a fire hazard!
Be careful that the safety rules don't become curriculum. Rules are important and necessary, but they don't make children safe - careful behavior does.
Books are good!
For students of all ages, a well-equipped library is an essential part of a makerspace. Combining them should be the best of both worlds! However, there are essential makerspace books that are not typically found in a school library. Students should have access to all kinds of books that will inspire them with ideas for projects, or just stretch their imaginations.
Look for a variety of books at all levels:
- How-to books - digital photography tips, how to do special effects in movies, how to build things, crafting, sewing
- Books of projects and crafts for kids - books with step-by-step pictures are very useful
- Puzzle books - codes, math tricks, logic puzzles
- Cross-cultural books - games from around the world, Islamic tile patterns, Aboriginal paintings, Native American weaving
- Artistic books for inspiration
- MAKE magazine
- Computer and coding books and magazines
There is no one right way
Of course, ideals are, well, ideals, and you may be "making do" within your existing school space. There may be advantages, like lots of shelves and computers, or there may be things that don't work quite so well, like bolted down furniture or poor lighting. Making do is the heart of being a maker, so just think of your space as one more variable to tinker with!
--------------------------------------------------------
Bio:
Sylvia Martinez is a maker, mom, engineer, and the co-author of the book, Invent To Learn: Making, Tinkering, and Engineering in the Classroom, called "the Bible of the classroom maker movement." Sylvia speaks to and works with schools around the world evangelizing authentic, inclusive use of technology across the curriculum. She is president of Constructing Modern Knowledge Press, creating books and professional development advocating using modern technology for learning. Sylvia is also the principal advisor to the NSF-funded FabLearn Fellows program at Stanford University. Prior to that, Sylvia ran the educational non-profit Generation YES, designed and programmed educational software and video games, and was an aerospace engineer specializing in GPS navigation and high frequency receiver systems.
--------------------------------------------------------
Additional resources
- Invent To Learn: Making, Tinkering, and Education in the Classroom - Books, links, resources, and professional development for making in the classroom.
http://www.inventtolearn.com - Sylvia Martinez - The website of Sylvia Martinez http://sylviamartinez.com
- Constructing Modern Knowledge - the premier event for summer teacher professional learning with the tools and materials of the 21st century.
http://www.constructingmodernknowledge.com - Educators interested in designing productive learning environments need to have The Language of School Design: Design Patterns for 21st Century Schools by Prakash Nair and Randall Fielding in their library. Examples of their learning design principles may be found at http://fieldingnair.com.